Hi everyone how are you? I’m not too good myself. My gorgeous little cat has been missing for 3 days and with all the weather I am obviously worried. Also having man troubles but you don’t want to hear about that.
Anyways, I have a lot of friends who aren’t sure how to contour and what products to use so I thought I’d do a little tutorial. I will eventually do a video too 🙂 now some of the products I don’t have on me but I’m going to list everything you should use and what I use!
You will need-
- Primer- I use Rimmel Stay Matte
- Foundation- l’oreal Infallible Matte
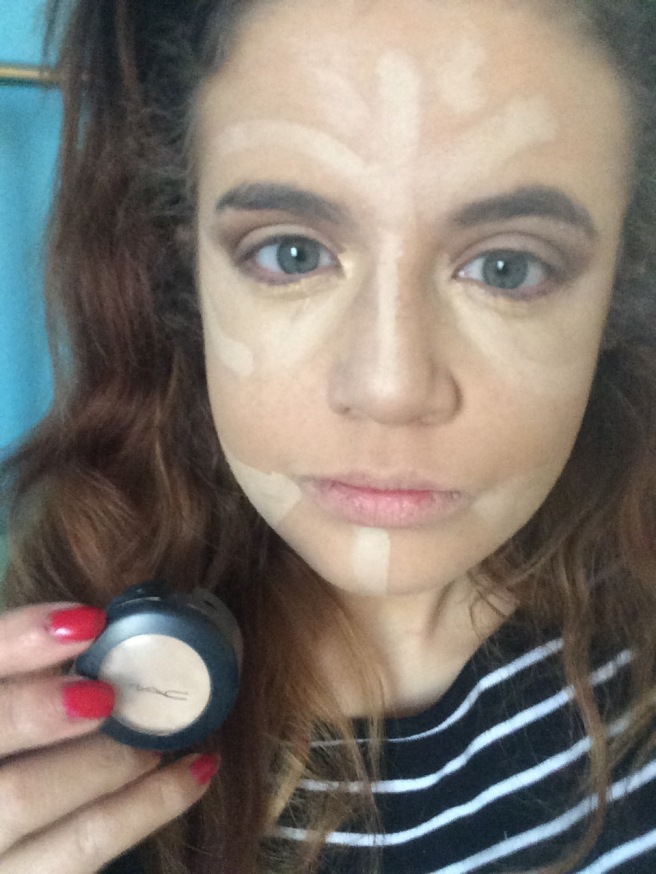
- Concealer to highlight- Mac Studio Finish
- Contour- to define. You can use anything from bronzer to a dark concealer. I use NYX powder Highlight and Contour Pro Palette
- Brushes- A large and small buffing brush. Concealer brush, and angled blusher brush. I use Real Techniques.
Step One
Cleanse any Makeup already on your face and then prime your face. I prefer to put a small blob of the product on my palm, rub my hands together and just smother it all over.
Step Two
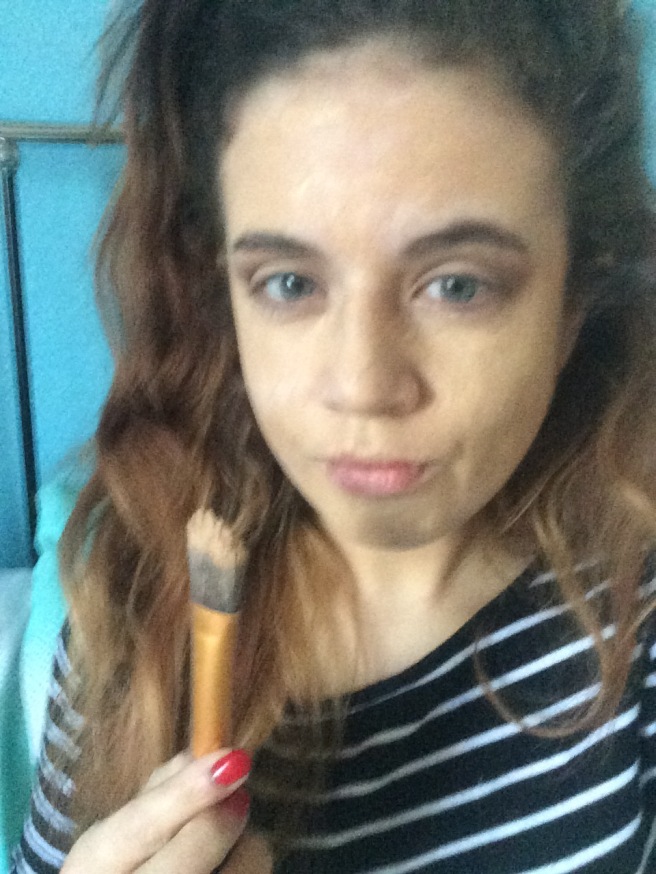
Base. It is important to do your base before the contour unless you’re happy with your skin/colouring and prefer not to use any foundation. I push a big blob of my foundation onto the back of my hand and with a foundation brush, blob it all around my face. I then blend it all together with a big fluffy kabuki buffering brush.
Step Three
Now to highlight. If you have fair skin you will need a fair shade to contour. I am using a Mac studio fix concealer for my contouring but you can use a cream or powder shade from a contour kit too. Place it as shown below with a concealer brush. Apply concealer under your eyes as normal, dragging it down as triangles. Place some concealer on the bridge of your nose, bringing up onto your forehead, and drag a line under your chin and if you want to help the illusion of a thinner face, apply in triangles beside each mouth corner. Blend this into the skin with a small buffing brush in circular or fast motions depending on the area. On the forehead, buff the concealer in circular motions moving upwards.
Defining. Now the way you do this all depends on your face shape and you can learn more about this on YouTube. Search contouring for [your] face shape.
I have a round face and a slightly large (sigh) nose, so my aim is to make my face and my nose look thinner. I start this by getting a small shadow brush and on either side of my nose, brush a small line of powder up and down, blending with my finger. To do this I use a lot of pressure and a shade two shades darker than my colour.
Next, with a contouring brush, I gently outline my face with the same shade. So I literally go all around my face, under the chin blending into my neck and then blending the sides sideways, and my forehead upwards.
So the cheeks need a section of their own if you decide to do this. If you’re gifted with high and lovely cheekbones, a dust of bronzer and a highlighter will do the trick but if like me you have a chubby face you may want to create your own cheekbones. This may take a lot of practice and for this part you may like to watch a tutorial on youtube. Here is what I’m using-
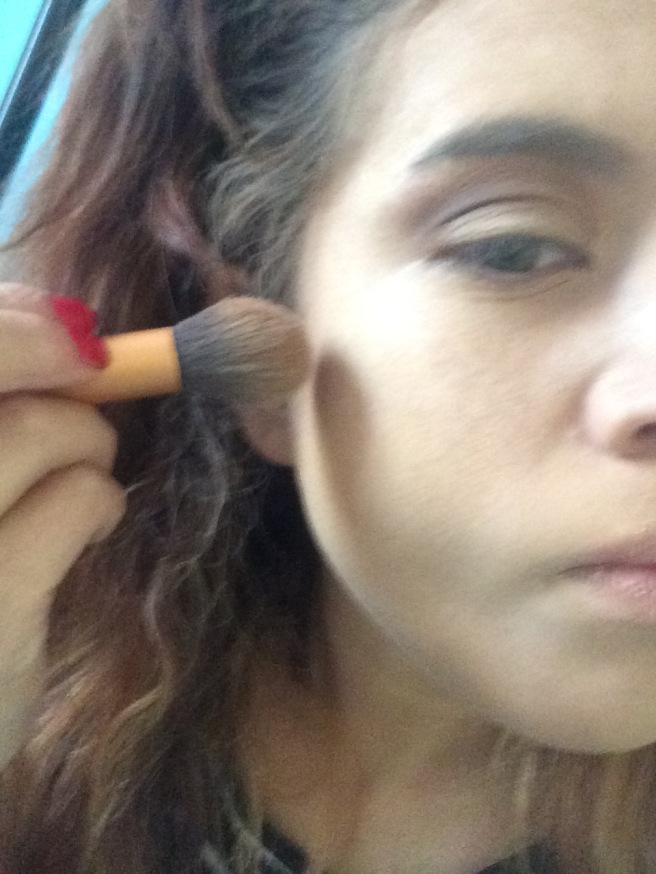
 Get an angled blush brush and place against your cheek like this just under where your cheek bone should be. If you can’t find them, suck in your cheeks. Hold the brush like this
 Get a light bronzer and then move just under where your cheekbone starts in a fast up and down motion. Keep going until blended, and then with a slightly darker bronzer repeat the process just underneath the line you created. Optionally, dab a cream or powder highlighter right on your cheekbone.
Step 6
Make sure everything is blended and dust over your face with a translucent powder to set it. Use a setting spray if you want your ️Makeup to stay on for a while and voila! You have your contour. ❤️


being pale, I really struggle to find a matching contour shade. thanks for you advice!
LikeLike
No problem! It’s always two shades lighter two shades darker x
LikeLike
Love your tutorial, your makeup is so on point! ❤
LikeLike
Thanks so much! Glad you enjoyed x
LikeLike
Thankyou! 😘
LikeLike
Lovee this post!! And the picture guide was so helpful!! ❤ ❤
http://slayedbyjae.wordpress.com
LikeLike
Thankyou! X
LikeLike